Add a Center Photo to Your Circle Sound Wave

Adding a center photo to a circle sound wave turns a beautiful data visualization into a complete portrait: the face, the song, and the voice that connects them, all in one frame. WaveVisual's circle sound wave now lets you drop an image right into the middle of the ring, adjust the crop until it's exactly right, and export it faithfully across every format—PNG, JPG, PDF, SVG, and all video options. What you see on screen is what you get in the file.
What you can place in the center of a circle sound wave
Any image works as a circle sound wave center photo—portraits, landscapes, album covers, logos, or illustrations. The image is cropped to a circle that fills the space inside the waveform ring. You control exactly which part shows by panning and zooming in the crop editor.
Popular uses:
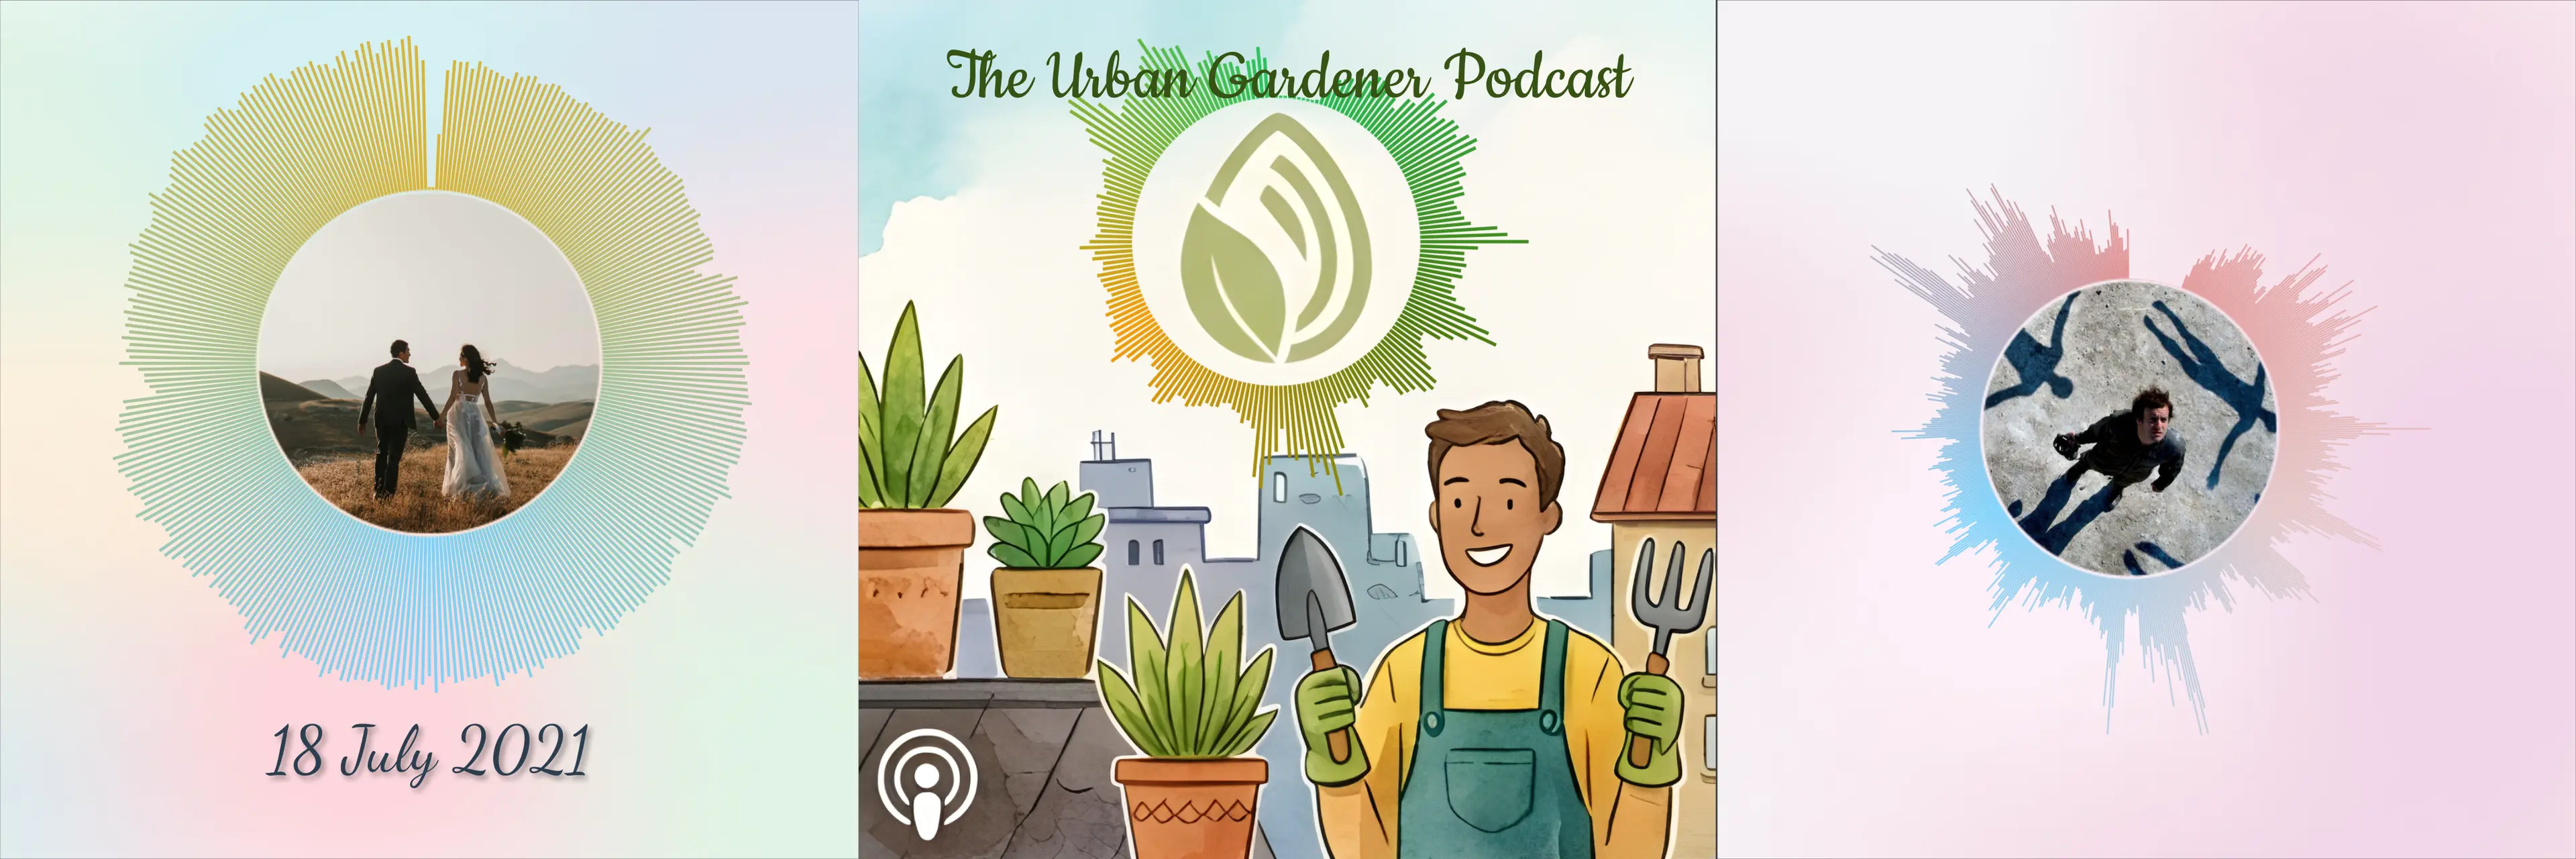
- Album art: Artist photo or album cover art framed by the title track's circle sound wave
- Wedding keepsakes: A couple's portrait inside the ring of their vows or first dance song
- Podcast branding: Show logo centered in the circle sound wave of an episode highlight
- Memorial pieces: A portrait honored by the person's voice or a favorite song
- Business cards: Headshot inside a circle sound wave made from your name pronunciation
How to add a center photo to your circle sound wave
On desktop
Select a circle waveform on the canvas. The waveform toolbar that appears at the top of the editor includes a center image button. Click it to upload a photo from your device—the image loads immediately and fills the center circle with a default crop.
On mobile
Tap the circle sound wave to select it, then open the waveform settings sheet. Scroll to the center image section. Tap to upload from your camera roll or files.
In both cases, you can swap the center photo at any time by uploading a new one through the same button or section.
Adjusting the crop
The default crop centers the image inside the circle, but most photos need a small nudge or zoom to look right. Click or tap Adjust crop to open the crop editor.
Inside the crop editor:
- Pan: Drag the image to move it left, right, up, or down inside the circle boundary
- Zoom: Pinch (on mobile) or use the slider (on desktop) to make the subject larger or smaller within the frame
- Preview: The circle mask shows you exactly what will appear in the design as you adjust
When the composition looks right, tap or click Apply. The crop is saved to your design—the editor, all export formats, and any subsequent edits will show this exact framing.
If you tap away without applying, the previous crop is preserved. Nothing is lost.
Why the crop matters for exports
A circle sound wave with a center photo often ends up as wall prints, digital downloads, and animated videos—sometimes all from the same design. The crop you apply in the editor is baked into every export format:
- PNG — Transparent or solid background, center photo appears correctly cropped
- JPG — Full image with your crop preserved
- PDF — Print-ready, vector-sharp ring with photo center
- SVG — Scalable output with the photo embedded and cropped
- MP4, GIF, WEBM, MOV — Animated bars, static center photo (your crop is locked in)
The same framing you chose in the editor is what prints or plays. To learn more about animated exports and how your circle sound wave looks in motion, see Your sound, in motion.
Design ideas to try
Single color ring, vivid photo
Set the circle sound wave to a single neutral color—white, gold, or black—so the ring becomes a frame rather than a subject. Let the center photo carry the visual weight. This works especially well for print designs where you want the image to stay prominent.
Gradient ring that echoes photo tones
Use the eyedropper (or manual color input) to pull a warm tone from the photo for one end of the gradient and a cool tone for the other. The ring feels like it belongs to the photo rather than sitting over it.
Circle wave inside a square canvas
A circle sound wave on a square canvas has four corners of negative space. Use those corners for text—a name, a date, a lyric—and let the circle and its center photo anchor the composition. This is a classic poster layout that prints beautifully at any frame size.
Stacked circle waves with a shared center hierarchy
If you have multiple sound waves on the canvas, you can use two or three circle sound wave layers at different sizes. Place the center photo only on the primary (largest) wave for a clear focal hierarchy, and leave the smaller rings photo-free.
Frequently asked questions
Can I use the center photo with waveform styles other than circle? The center photo option is specific to the circle sound wave style. It appears in the toolbar or settings sheet when a circle waveform is selected. If you switch the waveform style, the photo control is hidden but the uploaded image is remembered if you switch back.
What image formats are supported? Standard image formats—JPG, PNG, WebP, and most common formats—are supported. A photo of at least 500×500 pixels will look clear at print sizes.
Can I have different center photos on different circle sound waves in the same design? Yes. Each circle sound wave on the canvas is independent. Select a waveform, upload a photo, and adjust its crop. Then select a different circle sound wave and upload a different photo. Each stores its own image and crop settings.
Does the center photo affect video export? Yes, and it works well. In animated exports (MP4, GIF, WEBM, MOV), the waveform bars animate around your static center photo—the photo doesn't move or change. This creates a polished "artist photo surrounded by a pulsing waveform" effect popular for music promotion.
Is there a way to remove the center photo? Yes. In the center image controls, there is an option to remove the current photo and return to an empty center circle.
Does the center photo print well? Yes. The PDF and high-resolution PNG exports render the center photo at full quality. For large prints (16×16 inches and above), use a source photo of at least 1000×1000 pixels to keep the center image sharp.
Getting started
Open the WaveVisual editor, select or switch to the circle waveform style, and look for the center image option in the toolbar (desktop) or waveform settings sheet (mobile). Upload a photo, adjust the crop until it's right, and export.
Your circle sound wave becomes a complete portrait: the person, place, or moment at the center, and the sound that defined it radiating outward.
More from WaveVisual: the sound wave generator, music visualizer, and pricing.